
Here's a very fun project for all ur kids parties, showers, birthday, etc...
It's cheap, creative, customisable and upgradable...
- Cheap beacuse you only need paper napkins...
- Creative because u can come up woth any shape u want, shirt, pants, dress, t-shirt, etc...
- Customisable because u get to choose the colour, design, and shape u want that matches ur party (i.e. I did these to match a clown theme, for my friends shower (jungle theme) we did a kaki safari suit, we used the same tutorial below, but folded the sleeves and the pants to make it look like a safari suit, for a beach theme, u can also make a sailor suit !!!)
- Upgradable because u can add to it any items u like, buttons, ribbons, felt... name tags, belt ribbons, etc...


 Below I will try to show how to make them... Please bare with me, and for additional information, please email me...I will be more than happy to help.
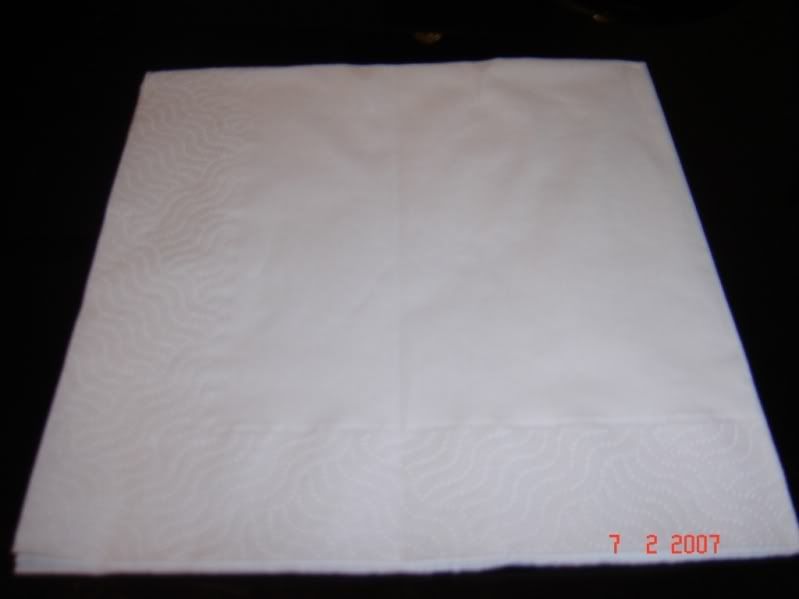
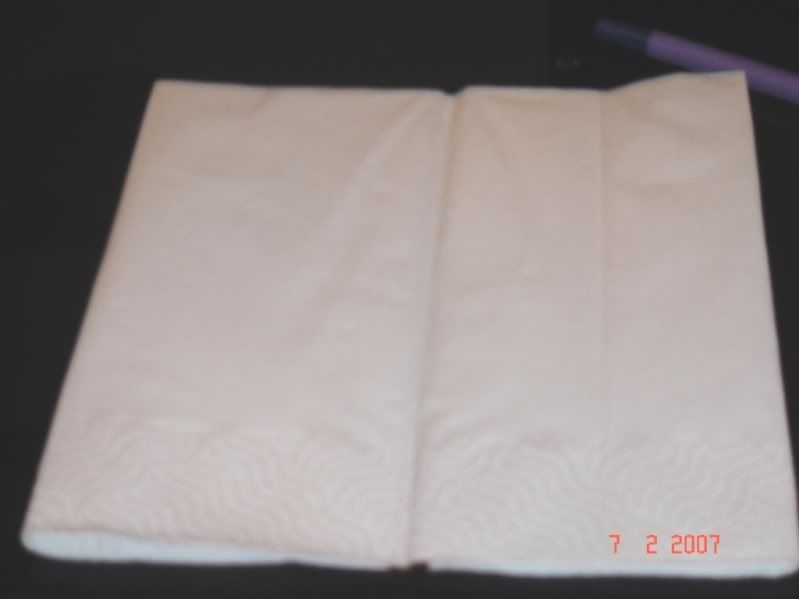
A) u may use the small or larger size of any square napkin :

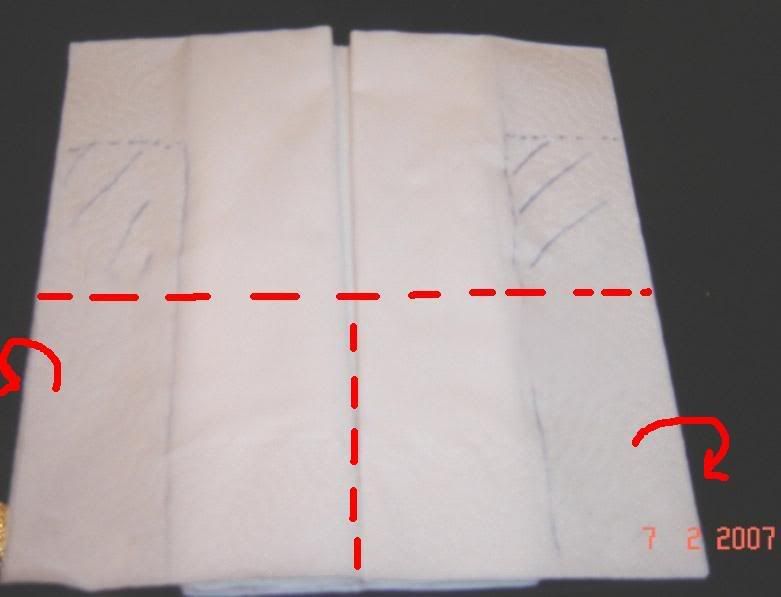
Now there are 2 types, if u wish to make a full dress, just cut a horizontal line shown as a blue dotted line in the pic below:
If u wish to make a shirt and a pant, cut 2 horizontal lines, one at the blue dotted level (for the shirt sleeves) and one at the red dashed line (for the pants):
In both cases, once u cut the horizontal lines, fold back the layers underneath as shown in pic below:
Dress :
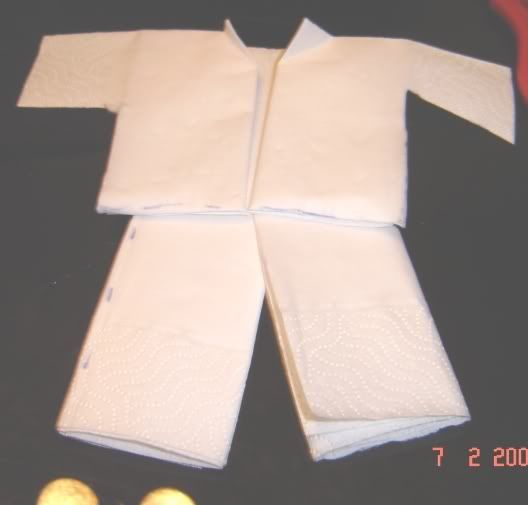
Shirt :
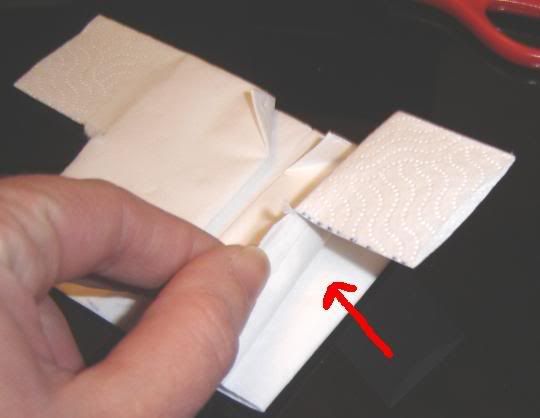
 For the pants, once u cut the horizontal line (dashed in red), also cut a vertical line (shown as a dashed red line), and fold back the layers underneath (as shown in pics above):
then u'll have 2 leg of pants, fold the cut sides inside, and glue each leg, then glue both legs on top if each others :
It's cheap, creative, customisable and upgradable...
- Cheap beacuse you only need paper napkins...
- Creative because u can come up woth any shape u want, shirt, pants, dress, t-shirt, etc...
- Customisable because u get to choose the colour, design, and shape u want that matches ur party (i.e. I did these to match a clown theme, for my friends shower (jungle theme) we did a kaki safari suit, we used the same tutorial below, but folded the sleeves and the pants to make it look like a safari suit, for a beach theme, u can also make a sailor suit !!!)
- Upgradable because u can add to it any items u like, buttons, ribbons, felt... name tags, belt ribbons, etc...

 Below I will try to show how to make them... Please bare with me, and for additional information, please email me...I will be more than happy to help.
A) u may use the small or larger size of any square napkin :
B) Start by folding each side of the napkin in the middle, and make sure to fold in the direction shown on the following pic:
Side 1 :
Side 1 :
Side 2 :
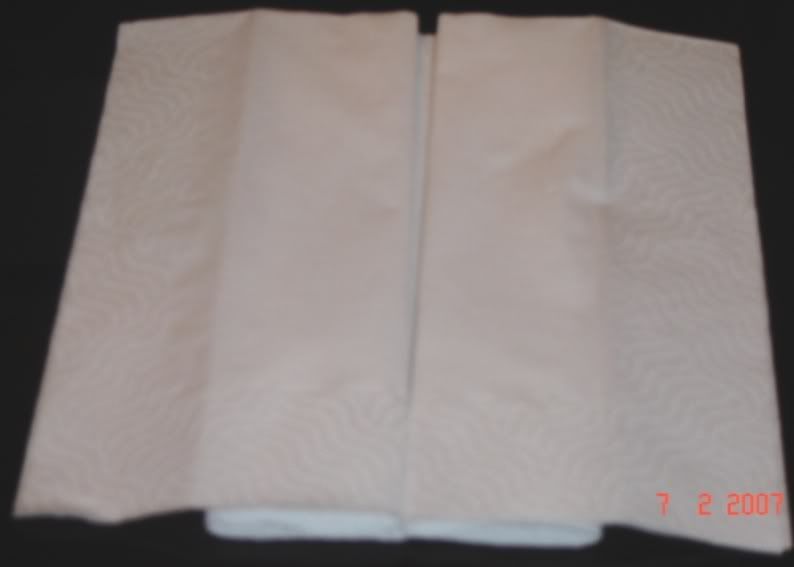
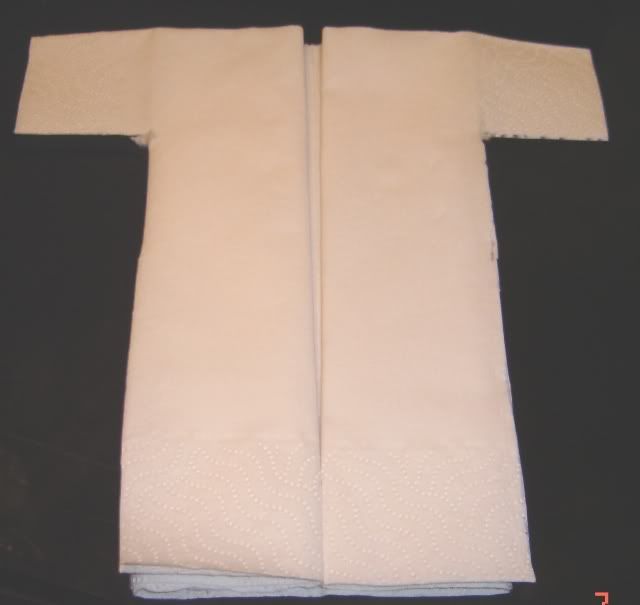
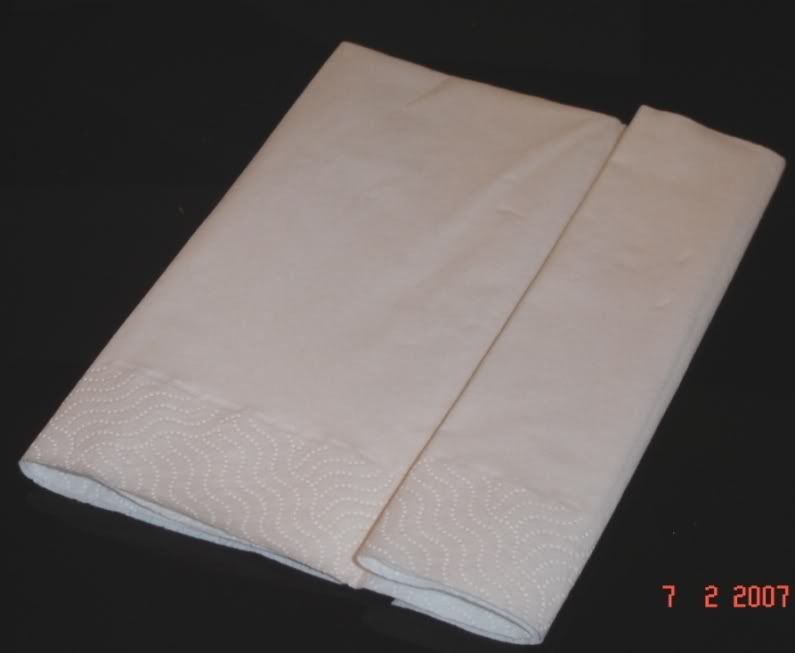
C) You should have this shape :
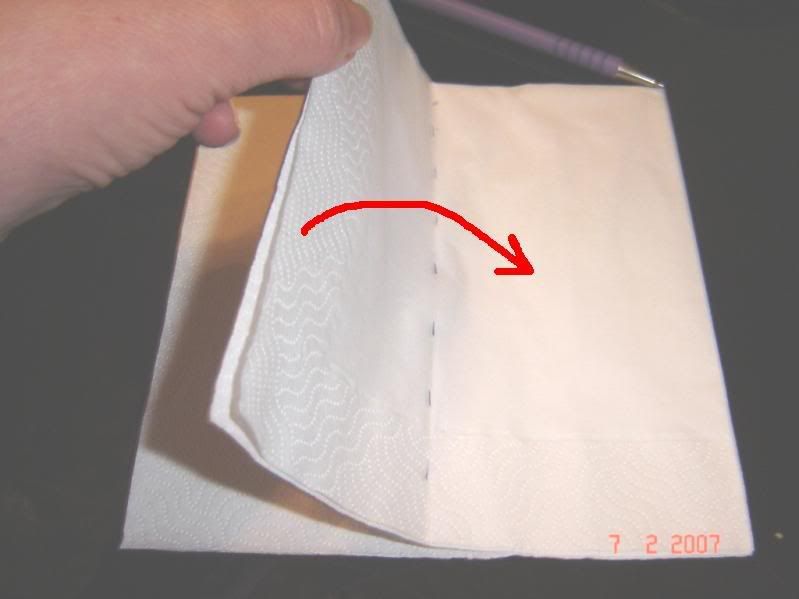
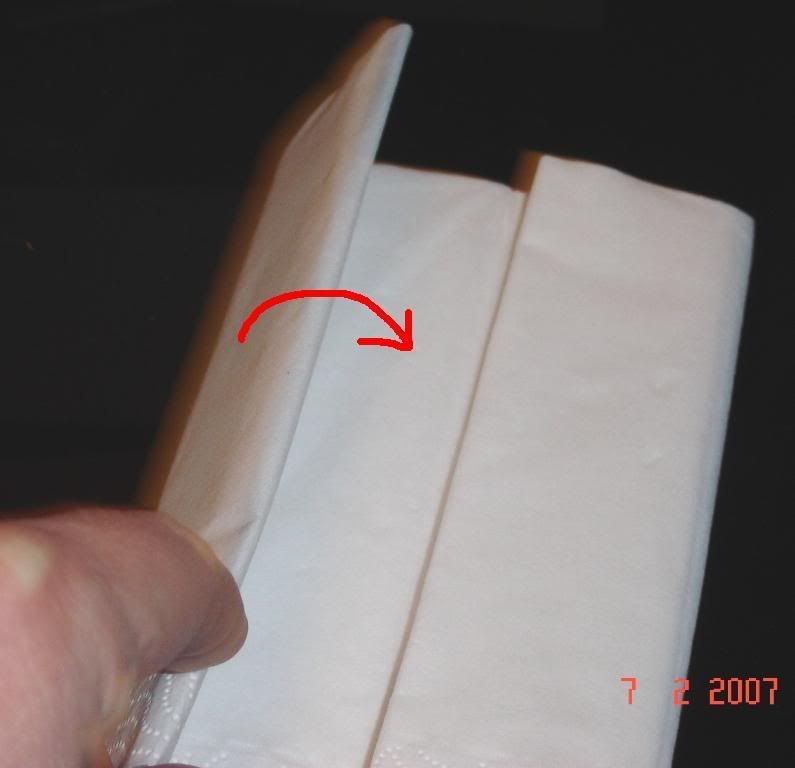
Now open the napkin in the center where the red arrows are pointed (don't let the thumb direction mislead u-just open it at the center).
U should have the following shape :
U should have the following shape :
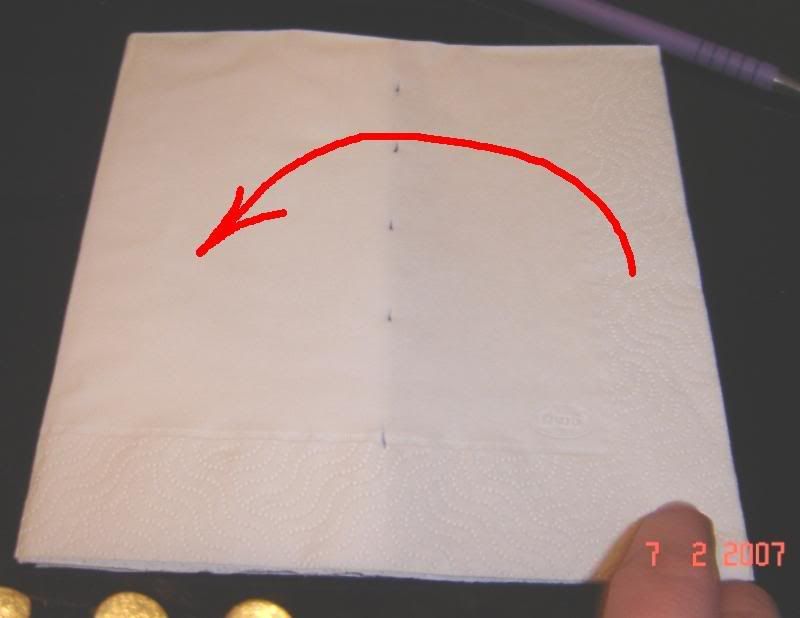
D) Now again fold the centers of each side :
until u get the following final shape :
until u get the following final shape :
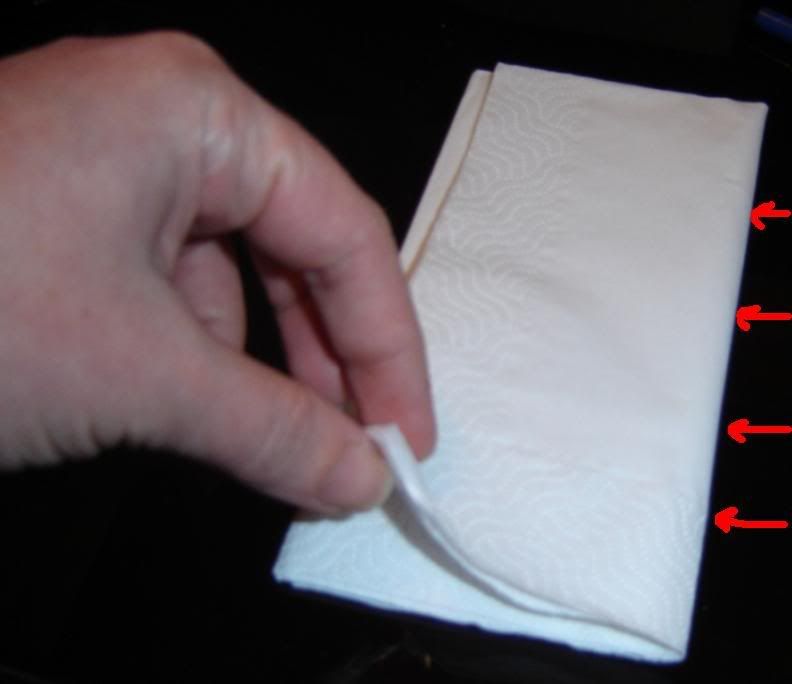
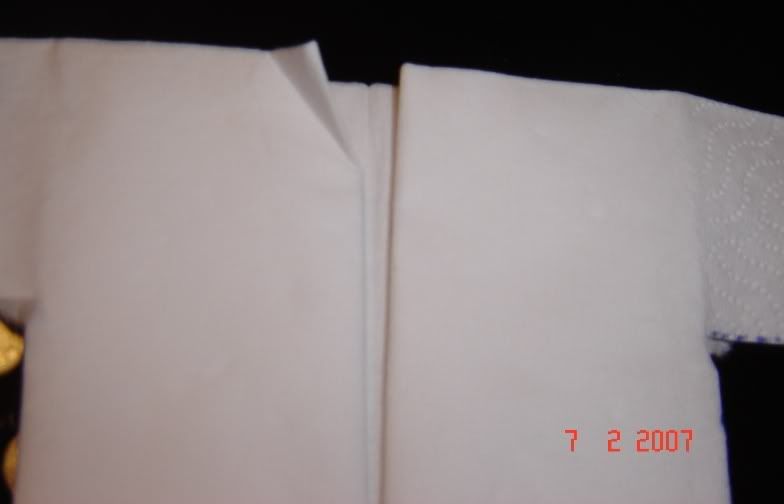
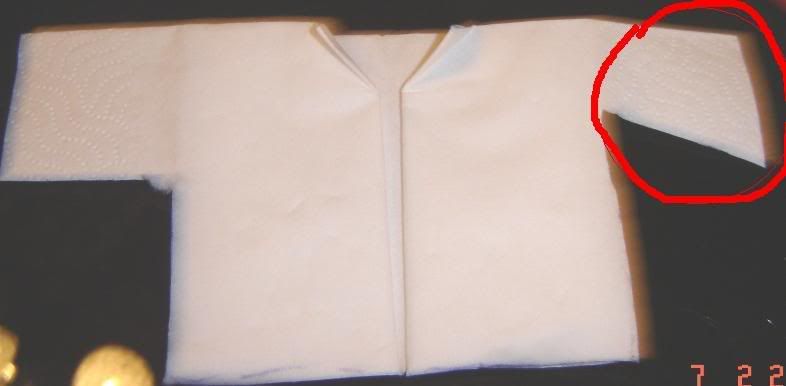
E) Now remove one of the folded layers which will make the sleeves :
Now there are 2 types, if u wish to make a full dress, just cut a horizontal line shown as a blue dotted line in the pic below:
If u wish to make a shirt and a pant, cut 2 horizontal lines, one at the blue dotted level (for the shirt sleeves) and one at the red dashed line (for the pants):
In both cases, once u cut the horizontal lines, fold back the layers underneath as shown in pic below:
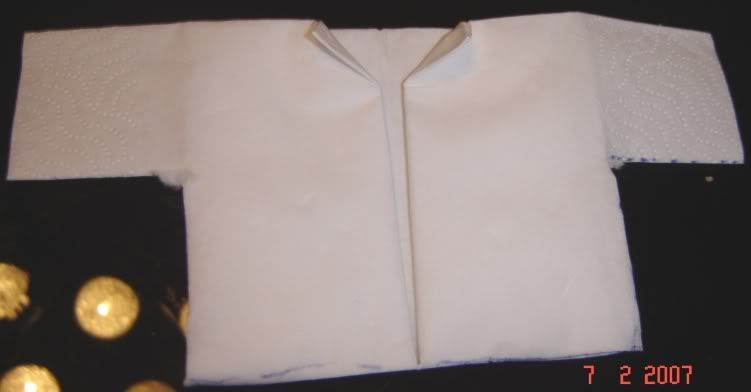
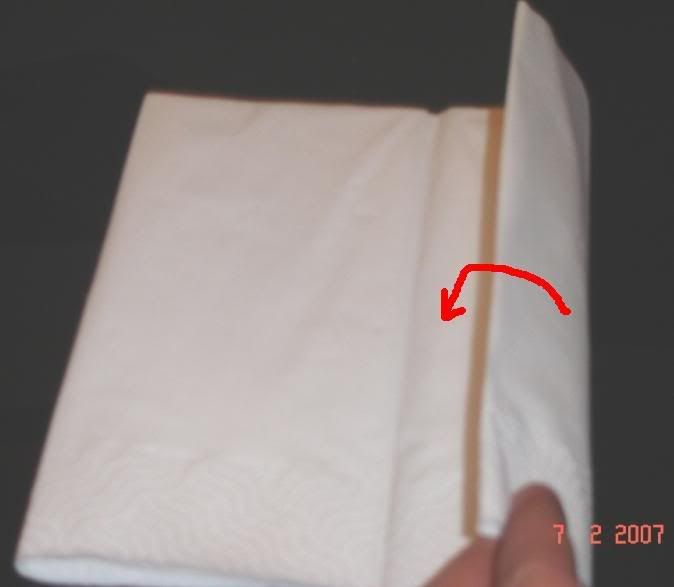
Now u will need a sticky glue, just to glue the folded sides on the back, u will figure out which sides need to be glued there's no rule, I usually glue the back of the shirt and dress, and sometimes I glue the inside of the shirt so it doesn't flip-flop when picked up by the guests.
example: glue this part :
example: glue this part :
Dress :
Shirt :
For the pants, once u cut the horizontal line (dashed in red), also cut a vertical line (shown as a dashed red line), and fold back the layers underneath (as shown in pics above):then u'll have 2 leg of pants, fold the cut sides inside, and glue each leg, then glue both legs on top if each others :
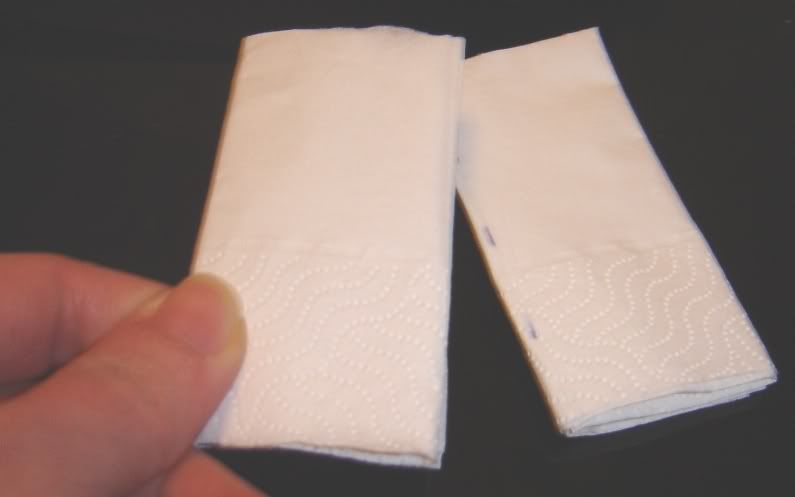
Eh voila :
You can also cut diffrerent shapes of sleeves or legs :
In all cases, after I glue the "flippy" sides, I usually iron the "outfit" to have the folds smoothed.
Don't forget if u like what u see, and u decide to make ur own version, please post pics to my post comments,
Enjoy it !!!
No comments:
Post a Comment